
Ok folks! D-Day has arrived, time to get workin’ on some trousers!
A quick note: You’ll notice that I didn’t post a sew-along schedule. This is because I am not sure how frequent (or infrequent) the posts need to be! I plan on working each full step per post, with a few days thrown in between so everyone can get their pants rolling, but do let me know if you’re feeling like everything is moving too fast and you need a minute to catch your breath 🙂 Of course, these posts will always be here for future sew-alongers! So please don’t feel like you have to rush through to appease the Thurlow Gods 🙂

Today we are sewing the front pockets of our trousers, sections 2-3.
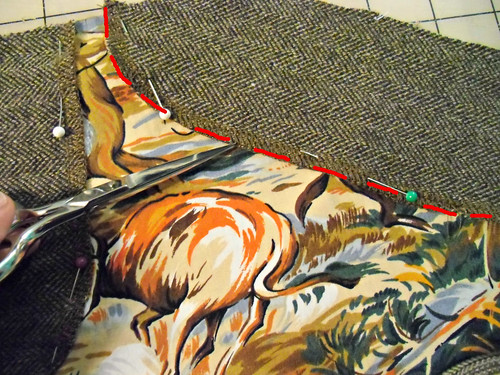
We start with the pocket facing and pocket piece – 7 & 8.

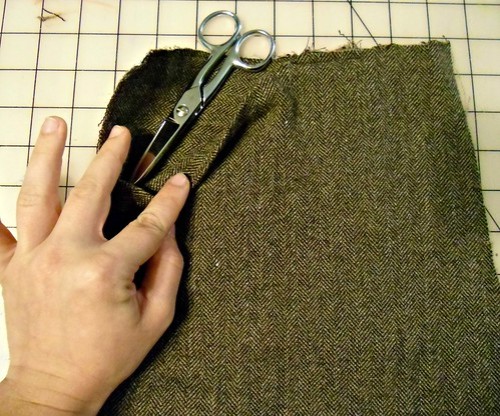
Finish the curved edges of both pieces, as shown.
If you have not already decided how you would like to finish your raw edges, consider this your kick in the butt! As you can see, I serged mine (what can I say – I’m a lazy seamstress at heart), but no worries if you don’t have a serger. Sunni has a whole mess of seam finishes right here and any of these will work. Personally, I think those bound seams look super yummy. Do what you want, though!

Grab your front pocket lining – piece 9 – and lay your pocket piece & facing on top, with the right sides all facing up and the weird notches & crannies all matching.
We are going to stitch these pieces down to the pocket lining, veryyyy close to the edge, as indicated by the dashed lines. The whole point of this is so when we put the pocket lining in the pants, you will only see the facing pieces from the outside.
Also: horse butt.

Grab a trouser front and lay it out, right side facing up.

Place your pocket lining over the trouser front, right sides together, matching the diagonal line. Stitch all the way across with a regular 5/8″ seam allowance.

Trim, grade, and understitch this seam.

Flip the whole thing back and give is a good press. If you would like, you can topstitch the pocket at this point.
What we are looking at now is the WRONG side of the trouser front, with the right side of the pocket lining facing up.

Pick up the loose end of the pocket lining…

And fold it along the fold line (this should be indicated by notches), matching the edges at the opposite side.

Sew the bottom of the pocket lining only, as indicated by the red dashes. Finish this seam.
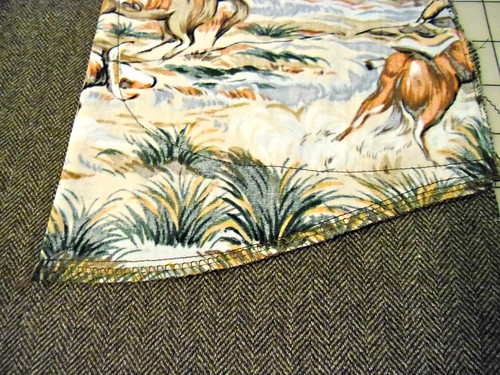

Baste pocket edges along the top and side.
If your pocket has a little bit of ~body to it, that’s ok! It’s not supposed to lie completely flat 🙂
You should end up with something like this.

Yay! A pocket!
Yay! A pocket facing!
Now that wasn’t so hard, eh? 🙂
We’ll start on the welt pockets in a few days (dun dun DUN!). If you have any questions, do let me know & I’ll do my best to answer 🙂


Eek! I need to cut out my muslin still! I got side-tracked by my Downton Abbey Maid costume I had to improvise and fit. It turned out pretty awesome though. Hurricane Sandy has given me a free day, so I’m off to cut out my Thurlows!
Looking forward to the welt pockets. I haven’t had a lot of luck with them, when I have made men’s trousers. And that lining is fabulous ! Currently, I Am finishing up the Koos coat with scallop treatment. Love the pattern, want to make it again, and I would love to see Koos come out with patterns for Men…
I’m actually really surprised that Koos doesn’t have patterns for men – isn’t his whole claim to fame the Bill Cosby sweaters?! Weird!
Welt pockets coming up soon! Just want to give everyone a few days to get caught up if they need to 🙂
Your “lining” fabric is totally amazing! I didn’t have time to do a muslin last week (stupid sickness) so I’ll be sewing that along with you as…a wearable muslin maybe?
YEAY! I can’t wait to get started! I think I understand this finally from your pictures! I have only made a few dresses before but I am totally crazy about all of your thurlows and yeahh i have a booty so I’m going make these STAT!
OH MAH GOD. COWBOYS!!!
Love.
That is all.
I am so glad I finally found a use for this amazing fabric haha!
Yeah!! I still need to cut my fabric, but I should be able to catch up with the next post!! So excited!! Thank you Lauren for this!!
Not difficult at all and I’ll admit that I learnt a new technique that I’m super happy with. You wrote “trim, grade and topstitch” and I thought “huh?” So I googled it and have applied my newly learned lesson to my front pockets and I’m over the moon! Thank you!
PS: here’s the link for anyone else who might be interested: http://www.learntosewcalgary.ca/articles/gradingunderstitching.htm
PPS: the “grading” is the bit i had never tried before and I must say that the seam is beautifully flat now. 🙂
Thank you for the link, I had no idea about it either. 🙂
I have a question about finishing the pocket facing and lining (as well as the fly facing): when instructions say to finish the edges, do they mean to the 5/8″ allowance or finish the edges at the size they already are? I’ve been having some weird matching up issues, especially with the fly facing…
I always finish the edges at the size they already are (except the part of the pocket lining where it’s sewn together; I chop that part off). Haven’t had an problems with matching up!
Awesome – thank you. A bit late to the party, but I couldn’t work out which way up to put the lining fabric in step 2. Here’s hoping I can make it all the way to the end.